How to Screen Record on Any Samsung Device (Phone, Tablet, Foldable) – Complete 2025 Guide

Table of Contents Show
So, you want to capture what’s happening on your Samsung screen, right? Smart move. Screen recording is one of those features that you might not think about daily, but when you need it? Man, is it handy. Whether I'm trying to show my parents how to fix a setting on their phone, grabbing a quick highlight from a game, or, more often for me, creating a tutorial for my tech blog or YouTube channel, being able to record my screen is clutch
For a while, you had to hunt down third-party apps, some better than others (and some, let's be honest, a bit sketchy with permissions). But thankfully, Samsung has baked a pretty solid screen recorder right into One UI on most of their recent Galaxy phones, tablets, and even their foldables.
If you've got a device running One UI 2.0 or newer, you're likely covered. But what if you don't? Or what if you can't find the darn thing?
That’s what this guide is all about. We're going to have a closer look at how to screen record on pretty much anySamsung Galaxy device you might have – from the newest flagships rocking One UI 7 all the way back to older models that need a little extra help. I'll walk you through using Samsung's own tool, what to do if it's playing hide-and-seek, some tips for Game Launcher (a neat trick for gamers!), the best third-party apps I've come across for older devices, and even some Samsung DeX specific methods. And yes, we'll tackle common headaches like the annoying "Samsung screen recording no sound" issue. So, let's get into it.
How to Use Samsung’s Built-In Screen Recorder (One UI 2.0 and Later)
So, good news first. If your Samsung device is from the last few years – think Galaxy S10/Note 10 or newer, most of the A series from 2020 onwards, or a Galaxy Tab S6 or later – you probably have a built-in screen recorder. Samsung rolled this out with One UI 2.0 (which is based on Android 10), and honestly, it’s a welcome addition. It means no extra app downloads for a core function, which, from a privacy and minimalism perspective, I always appreciate.
Samsung's One UI is packed with features, from this handy built-in screen recorder to the newer suite of Galaxy AI tools. If you're curious about exploring more advanced capabilities, take a look at my guide on how to use Samsung AI.
I’ve used this native recorder on various Samsung phones and tablets over the years, and for most day-to-day tasks, it’s surprisingly capable. Let's break down how to use it, whether you're on a Galaxy phone or one of their Tab series tablets.
How to Screen Record on Samsung Galaxy Phones (One UI 2.0+)

If your Galaxy phone is running One UI 2.0 or anything more recent (like the S20, S21, S22, S23, S24 series, the Note20, or any of the Z Flip/Fold lineup), here’s the drill. It’s pretty straightforward, which is exactly what you want.
Open Your Quick Settings Panel
You know the drill: swipe down from the top of the screen. I usually use two fingers to get the full grid straight away, but a double swipe works too. You're looking for an icon labeled "Screen recorder" – it typically looks like a little camcorder.
On my screen, it’s usually on the first page of toggles, but Samsung’s layout can vary, especially if you’ve customized it.
Add the Icon if It's Missing
Not seeing it? Don't sweat it. Sometimes it's tucked away.
Swipe to the next page of icons if you have one.
Still no luck? Tap the ⋮ (three-dot menu) or sometimes a pencil icon, and look for "Edit buttons" (or similar wording like "Button order"). You should see a section of available buttons not currently in your panel. Find "Screen recorder" and just drag it into your active Quick Panel. I like to keep mine on the first page for quick access. Tap Done. Problem solved.
Tap the Screen Recorder Icon
Once you tap it, a small menu will pop up asking about sound settings. This is key.
No sound: Pretty self-explanatory. Silent movie style.
Media sounds: This records the internal audio from your phone – games, videos, music playing in an app. Perfect for capturing gameplay without your commentary.
Media sounds and mic: This records both the internal audio and picks up sound from your phone's microphone. This is the one I use most for my quick Blog or YouTube tutorials when I need to narrate what I’m doing on screen.
Choose your weapon.
Tap "Start recording."
Your phone will give you a quick 3…2…1… countdown, and then voilà, you're live (well, recording). You'll see a small, usually floating, toolbar or an icon indicating that the recording is active. Now, anything you do – swiping through apps, demonstrating a feature, frantically trying to win a game – gets captured.
Use the Recording Controls (optional but handy)
That little floating toolbar isn't just for show.
Front camera overlay (Person icon 👤): Tap this, and a little bubble with your face from the selfie camera pops up, usually in a corner. Great for reaction videos or if, like me, you're making a tutorial and want to add a personal touch. You can usually drag this bubble around.
Heads up: some models, particularly on the budget end, might not support this selfie overlay. Always good to check.Draw on screen (Pencil icon 🖍): This is super useful. Tap it, pick a color, and you can doodle, write, or highlight things directly on the screen with your finger or S Pen (if your device has one). I use this all the time for my tech tutorials to point out specific menu items or features. Just remember, while the pencil tool is active, you can’t interact with the apps in the background until you toggle the pencil off again.
Stop the Recording
When you've captured what you need, tap the stop icon (it's a small square) on that floating toolbar. Alternatively, you can usually pull down the notification shade and hit stop there. The video is then automatically saved to your Gallery, typically in a "Screen Recordings" album. You'll also find it in the
DCIM/ScreenRecorderfolder if you're Browse through My Files. A little notification will usually pop up confirming it's saved.Review or Edit Your Video
Open your Gallery app, find your new masterpiece, and watch it back. Samsung's Gallery app has some basic editing tools built-in – you can trim the length, maybe add some music (though I usually do more advanced edits on my PC for YouTube content). It’s good enough for quick cleanups.
How to Customize Your Recording Settings
Before you even hit record, you can tweak a few things to get the output just right. For this, touch and hold the Screen recorder icon in Quick Settings. Or, you can navigate the scenic route: Settings > Advanced Features > Screenshots and screen recorder > Screen recorder settings. Here’s what I usually pay attention to:
Sound
We covered this, but it’s here too: No sound, Media sounds, or Media sounds and mic.
Crucial note: Due to privacy and DRM (Digital Rights Management), the recorder won't capture audio during phone calls or VoIP calls (like WhatsApp calls). Also, apps like Netflix or other streaming services will often black out the recording to prevent piracy. Frustrating sometimes when I want to show a UI element in a streaming app for a review, but understandable.
Video Quality
You'll typically see options like 1080p (High), 720p (Medium), or 480p (Low).
For anything I'm putting on my YouTube channel or want to look crisp, 1080p is my go-to. It's the sweet spot for clarity.
If I’m just making a quick recording for a friend or if storage is tight (or my phone is older and struggling), 720p is a decent compromise. 480p? Only if I'm desperate.
Selfie Video Size
If you’re using that front camera overlay, you can adjust how big or small your face bubble is. Choose what works for your layout – you don’t want your brilliant commentary to obscure what you’re actually showing.
Set these once, and they’ll be your default. Super handy.
How to Screen Record on Samsung Galaxy Tab (Tablets)

Got a Samsung Galaxy Tab? Good news, the process is almost identical. If you’re rocking a Galaxy Tab S6, S7, S8, S9, or a more recent mid-ranger like the Galaxy Tab A9+ (as long as it's on One UI 2.0 or newer), you've got this built-in.
A few tablet-specific notes:
Accessing the Recorder
Swipe down for Quick Settings. On some newer One UI versions tailored for tablets, you might need to swipe down from the right side of the status bar to get the Quick Settings, as the left side is for notifications. It's a subtle UI difference I noticed when I first got my hands on a newer Tab. Look for the same Screen recorder tile, tap it, pick your audio, and hit Start.
Recording Usage
The toolbar, drawing features, and (usually) front camera overlay work just like on phones. This is great for, say, recording your notes with an S Pen or demonstrating an app on the big screen.
Limitations
As I mentioned earlier, some lower-spec tablets (like the Galaxy Tab A8, for example) can record the screen just fine but might not offer the selfie camera overlay. It's one of those small feature differentiations you see between budget and flagship lines. Generally, the higher-end Tab S series will have the full suite.
Tablet Tip
Tablet screens are obviously larger. While your display might be super high-res (say, 1600p or more), the recording might still cap at 1080p depending on the device and software. Always a good idea to check those quality settings we talked about. Also, think about orientation. If you’re using your tablet in landscape mode (which I usually am), your video will naturally be in landscape.
So, for both Galaxy phones and tablets, Samsung's native tool is pretty solid for most common screen recording needs. But what if you're staring at your Quick Settings panel and that icon is nowhere to be found, even after trying to edit the buttons? Let's troubleshoot.
How to Enable the Screen Recorder Tile (If It’s Missing)
Okay, so you're sure your device should have it, but the Screen Recorder icon is playing hide-and-seek in your Quick Panel. Don't throw your phone yet! It might just be hidden or disabled. Here’s how I’d go about tracking it down:
Double-Check Quick Panel Editing
This is often the culprit. Swipe down fully to expand Quick Settings. Tap the three-dot menu (⋮) or the pencil icon (this varies slightly by One UI version). Choose "Edit buttons" (or "Button order," etc.). Now, carefully scan the list of "Available buttons" or the section showing buttons not currently in your panel. If you spot "Screen recorder," press and hold it, then drag it into your active Quick Settings grid. Position it where you can easily reach it – I usually put it in the top six. Tap Done. Hopefully, it's now visible.
Verify in Settings
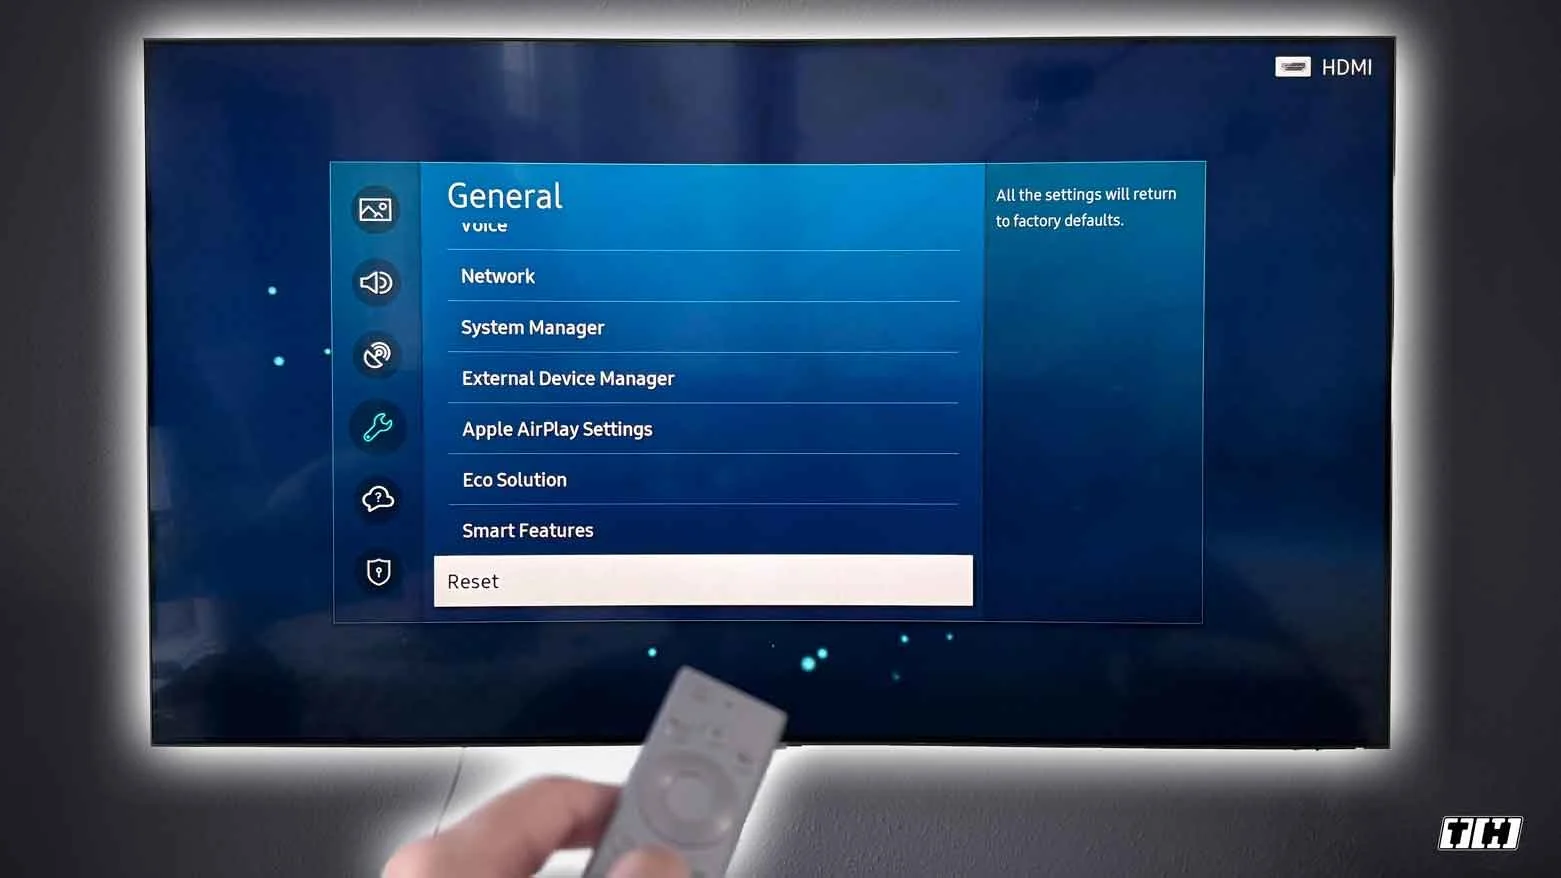
If it's not in the edit list, let's dig a bit deeper. Go to your main phone Settings > Advanced Features > Screenshots and screen recorder. If your device and software version support native recording, you should see settings for "Screen recorder" here.
If this whole menu option is missing, well, that's a strong indicator your device or current software version doesn't have the native feature. Skip ahead to the sections on alternatives.
If the menu is there, you can configure options, but the question remains: why isn't the button showing? Sometimes the actual system app for it can be disabled.
Check for a Disabled App
This is a bit more of a deep dive. Go to Settings > Apps. You might need to tap a filter or menu icon (often ☰ or a sort icon) and select "Show system apps" – this is crucial, as screen recording is a system function. Now, patiently scroll through that (long) list and look for "Screen Recorder." On some older One UI versions, this functionality might have been bundled under an app called "Samsung Capture." If you find it, tap on it. Is it "Disabled"? If so, tap "Enable." After enabling it, I'd give the phone a quick restart and then check the Quick Panel and its edit options again.
Update Your Software
Seriously, this fixes more weird tech gremlins than you'd think. Go to Settings > Software update > Download and install. Samsung sometimes rolls out features like screen recording in incremental updates. I’ve seen cases where some budget models launched without it on, say, One UI 3, but then gained it with an update to One UI 4 or 5. Keeping your device up-to-date is just good practice anyway for security and features. As someone who values data privacy and robust functionality, this is one of the first things I check.
Still no dice? If you’ve gone through all these steps and there’s no sign of the native screen recorder button or its settings, it’s very likely your specific Samsung model or its current Android/One UI version just doesn't support it natively. This is often the case for much older devices. But don't worry, you're not out of options! That’s where third-party apps or the Game Launcher method (which we'll cover next) come into play.
By now, if your Samsung device does have the built-in recorder, you should be all set to capture your screen like a pro. For those of you on older One UI versions or unsupported models, let's explore those workarounds.
How to Screen Record on Older Samsung Devices (No Native Recorder)

Alright, so you've dug through your Quick Settings, you've checked the main Settings menu, maybe even restarted your Samsung tablet or phone a couple of times, and… nothing. No built-in screen recorder. If you're nodding along, chances are you're using an older Samsung Galaxy device (think anything before 2019, like the otherwise excellent Galaxy S8, S9, or Note 8 series that ran Samsung Experience or the early One UI 1.0) or perhaps a more budget-friendly model from the A series (like the A10, A12, or A20 lineup). These phones often shipped without that native screen recording feature.
I've even seen some unfortunate cases where an update showed a grayed-out screen recorder button. Talk about a tease! It's there, but you can't touch it. Infuriating.
But please don't despair. Just because Samsung didn't bake it in doesn't mean you can't record your screen. You absolutely can. You just need a few workarounds. Here’s what I’ve found to be effective:
Use Samsung Game Launcher’s Recording Feature
Before One UI 2.0 made native screen recording a thing, Samsung's primary way of letting you record your screen was through its Game Tools, part of the Game Launcher. The idea was for gamers, obviously. But, with a little creativity, you could (and still can on those older devices) use it to record pretty much any app. We’ll get into the how-to in the next section – it’s a neat trick.
Good Lock’s Nice Shot Module (for the Enthusiasts)
If you’re someone who loves to tinker with Samsung’s Good Lock customization suite (you grab it from the Galaxy Store, though availability can be region-dependent), there was a module called Nice Shot. On older flagships like the Galaxy S9 or Note 9 running One UI 1.0, Nice Shot could add screen recording capabilities. It integrated with the screenshot tool. Now, with native recording being standard on newer phones, Nice Shot's role has shifted more to enhancing those existing recording options. For older devices, it was a path, but honestly, with some earlier versions having recording time limits (like 5 or 10 minutes), it wasn't always the most seamless experience. Something to be aware of if you go down that rabbit hole.
Third-Party Screen Recorder Apps (The Universal Fix)
This is, frankly, the simplest and often most powerful solution for any Android phone, Samsung or otherwise, that’s missing a built-in recorder. The Google Play Store is packed with them. Apps like AZ Screen Recorder, Mobizen, and XRecorder have been staples for years. They usually work on almost any device and often come loaded with more features than even the native recorders. We’ll dive into my top picks for these in a bit.
A quick heads-up for truly vintage Android versions (Android 9 Pie and older): Capturing internal audio (the sound from your apps) was a bit of a wild west. Most third-party apps on these older OS versions could only record external audio (whatever your microphone picked up). So, if you were trying to record gameplay on an ancient device, you'd get your button taps and your dog barking, but maybe not the in-game soundtrack unless you cranked up the volume (which isn't ideal). Android 10 and newer made internal audio capture much more straightforward for app developers.
So, to recap: if your Samsung is playing old-school and doesn't have its own recorder, a trusted third-party app is usually your best bet for flexibility and features. But if you primarily want to record gameplay, or you're just curious, let's look at that Game Launcher method.
How to Screen Record Using Samsung Game Launcher
Okay, so Samsung's Game Launcher. It's primarily designed to optimize your gaming experience and keep all your games in one place. But, as I mentioned, it has a screen recording function that was the go-to before the system-wide recorder became common. And yes, you can often trick it into recording non-game apps. I remember trying this on an older A-series phone to record a little tutorial for a specific app for my dad while I was in New Zealand. A bit roundabout, but it worked!
Here’s the general idea:
Enable Game Launcher
First, make sure it's even on. Head to Settings > Advanced Features and toggle Game Launcher on. If it’s already on, you’ll find the Game Launcher app in your app drawer.
Add Your App (or Game)
Open Game Launcher. It’ll show your installed games. If the app you want to record isn't a game (like, say, Chrome), you need to add it manually.
Tap the menu (often three dots or lines) within Game Launcher and look for an option like "Add apps" or sometimes it’s buried under a library management section. You can then select any app and add it to Game Launcher's library. Sneaky, right?
Start the App from Game Launcher
This is key. Open the app you want to record by launching it from withinthe Game Launcher interface. This tells your phone to apply the Game Tools/Game Booster overlay to it.
Access Game Tools/Booster and Hit Record
Once your chosen app is open and running, you need to bring up the Game Tools.
Older devices (with navigation buttons): You might see a small, often red, floating Game Tools button. Tap it. Or, sometimes an icon appears in the navigation bar itself (that row of buttons at the bottom of your screen).
Slightly newer devices (pre-native recorder, but with gesture navigation or later One UI versions): You might need to swipe in from the side of the screen where the Edge Panel would be, or sometimes tapping an icon in the notification panel when a "game" is active brings up Game Booster.
Inside the Game Tools/Booster overlay, you’ll see a bunch of icons – Screenshot, Lock touch, etc. Look for the Record icon (usually a video camera symbol) and tap it. A timer should appear, and you're off to the races.
Stop Recording
When you're done, tap the stop button on the recording overlay, or re-open the Game Tools menu and hit stop there. The video typically saves to your Gallery, often in a specific "Game Launcher" or "ScreenRecord" folder.
The Big Plus: Internal Audio (Usually for Games)
One of the main reasons people used the Game Launcher method, especially for games, was its ability to capture internal audio. Before Android 10, getting clean in-game sound without mic noise was tricky. Game Launcher often managed this. So, if you're trying to capture pure gameplay footage on an older device, this could be your best bet for good audio. If you're recording a non-game app this way, it might still capture its audio as if it were a game. Worth a shot!
This Game Launcher trick was a lifesaver for many on older Galaxy models like the S7, S8, and S9. It's also handy if you really want to avoid installing yet another app.
A quick note: Samsung is always tweaking things. On newer One UI versions that do have the system-wide screen recorder, you might find the dedicated "Record" button within Game Launcher/Game Booster is less prominent or even gone. Why? Because you can just use the main screen recorder toggle from your Quick Settings for everything, including games. It's simpler. But for those devices where Game Launcher is your only Samsung-provided option, the steps above are your path.
Now, if neither the (missing) native tool nor the Game Launcher workaround quite fits your needs, or if you're like me and sometimes want more granular control over things like resolution, bitrate, or even the ability to pause recordings, it’s time to explore some third-party apps.
Best Screen Recorder Apps for Samsung Phones (and Tablets!)
When the built-in options aren't there, or just don't cut it, the Google Play Store is your friend. I've tried a fair few screen recorder apps over the years, both for my tech reviews and for capturing content for my YouTube channels. Some are fantastic, some are… less so (especially when it comes to ads or permissions – always read those carefully!). Here are a few that consistently rise to the top, working well on Samsung devices:
1. AZ Screen Recorder
AZ is a veteran and still one of the most popular for a reason. It's generally reliable, doesn't slap a watermark on your videos (big plus for me!), and has no recording time limits in the free version. You get plenty of control over resolution (up to 1080p, sometimes even 1440p), bitrate, and frame rates (hello, 60fps smoothness!). It handles internal audio on Android 10+ and can, of course, record mic audio. I like its floating control button, countdown timer, and the ability to pause/resume. It even has basic editing tools.
Pros: No watermark, feature-rich, stable.
Cons: The free version has ads. You can pay to remove them and unlock a few more bells and whistles like GIF conversion.
My take: AZ is a solid, dependable workhorse. If I need a third-party recorder, this is often my first install.
2. Mobizen Screen Recorder
Mobizen is another big name, and they even used to have a "Mobizen for Samsung" version, though the main app works fine. It’s very user-friendly, so if you're not keen on fiddling with a million settings, this is a good starting point. It records up to 1080p at 60fps and includes a Facecam option and some editing tools. A cool feature is their "Clean Recording Mode," which hides the watermark and floating controls for a pristine output – and you can often disable the watermark even in the regular free mode after watching an ad or via settings, which is fair.
Pros: Easy to use, good "clean recording" option, editing included.
Cons: The standard free version has ads and will watermark by default (though usually removable). Some advanced bits might be premium (depending on what you’re looking for).
My take: Good for beginners or those who want an all-in-one with editing. Its past Samsung-specific optimization might still give it an edge on some older models.
3. XRecorder (by InShot)
XRecorder has gained a lot of traction, and I can see why. It's stable, the interface is clean, and the feature set is strong. You're looking at up to 1080p/60fps (even higher on some devices if you go pro), customizable bitrate/resolution, and internal audio on Android 10+. It also has a brush tool for on-screen drawing and a Facecam. Crucially, no watermark in the free version. That’s a huge win for anyone creating content.
Pros: High-quality recordings, no watermark out of the box, good audio control, reliable.
Cons: Some advanced features (like super-high FPS) or ad removal are behind a (usually affordable) one-time purchase. Max settings can chew through storage, but that’s true for any recorder.
My take: XRecorder is fantastic if you're looking for an app that "just works" and delivers good quality reliably. It's also often praised for being stable.
4. ADV Screen Recorder
If you're after something lightweight, completely free, and with no watermarks or time limits, check out ADV. It offers the essentials: pause/resume, on-the-fly drawing, front/back camera overlay, and control over resolution/FPS. The interface isn't as flashy as some others, but it's quite straightforward.
Pros: No watermarks, simple, all essential features present.
Cons: UI is a bit basic and outdated; lacks some of the more advanced editing or conversion tools found in others.
My take: For a quick, no-fuss, no-cost recording, ADV is a still a solid pick. But honestly, I think the alternatives are better.
5. Others to Consider
The list goes on. Vidma Screen Recorder often gets praised for offering a lot for free (no watermark, internal audio). There's also an open-source app literally called Screen Recorder – No Ads (by developer Kimcy929) if you're into FOSS. It has been mostly discontinued but it should still work on older devices (particularly those running Android 5.0 (Lollipop) through Android 10).
And don't forget Google Play Games! If you launch a game through the Play Games app, it has its own built-in recording function (often capped at 720p, but includes Facecam). It’s limited to games, but if you're already in that ecosystem, it’s an option.
For most Samsung users needing a third-party solution, though, one of those top four (AZ, Mobizen, XRecorder, ADV) will likely cover all your bases.
My Pro Tip When Using Third-Party Recorders
Before you hit that big red record button, dive into the app's settings first. Seriously, take a minute.
Resolution & Frame Rate
Match it to what you need. Recording your phone's QHD+ screen at full res and 60fps will look amazing, but the file sizes will be massive. For most of my YouTube stuff, 1080p at 30fps or 60fps is the sweet spot between quality and manageability. If it’s just a quick demo for a friend, 720p is often fine. It’s similar to photography: you don't always need the largest RAW file.
Audio Source
Double-check if it’s set to record "internal audio" (if on Android 10+) or "microphone," or both, depending on your needs.
Storage
Screen recordings, especially longer ones at high quality, eat storage like crazy. I learned this the hard way when I was starting my YouTube channel, constantly running out of space on my phone. If the app allows, and your phone has an SD card, see if you can set the save location to the SD card (or even an external SSD). Keep an eye on your available space!
Battery
Keep in mind that screen recording, especially at high resolutions and frame rates, does use extra processing power and can impact battery life. If you notice your phone battery dying faster than usual generally, check out these tips to optimize its longevity.
Permissions
The first time you launch any of these apps, they'll ask for permissions – screen capture (obviously), microphone, storage access, maybe "draw over other apps" for the floating controls. These are necessary for them to work. Just be sure you're downloading from the official Play Store and the app has good reviews – the Screen Recorder by developer Kimcy929 is an exception. As someone who values data privacy, I'm always a bit cautious here.
Once you've got your settings dialed in and permissions granted, you're good to go! You can now record pretty much anything on your Samsung screen, whether Samsung gave you the tools upfront or you had to bring your own.
How to Screen Record in Samsung DeX Mode (Tips & Workarounds)
Alright, let's switch gears a bit and talk about Samsung DeX. If you haven't used it, DeX is Samsung's platform that lets you connect your Galaxy phone or tablet to an external monitor, keyboard, and mouse, essentially giving you a desktop-like computer experience powered by your mobile device. I’ve used DeX quite a bit in the past, from drafting blog posts on a bigger screen to organizing files, and even some light photo editing when I’m away from my main setup. It’s surprisingly capable.
But what if you want to record your DeX screen? Well, unfortunately, Samsung's native screen recorder, the one we've been talking about, doesn't work in DeX mode. Poof. Disabled. It's a known quirk, one that even seasoned Samsung watchers (like the folks over at SamMobile, I recall) have pointed out, hoping for a fix. It’s definitely a miss, in my opinion.
So, how do you capture your DeX session? Don't worry, where there's a will (and a bit of tech know-how), there's a way. Here are the methods I’ve found most practical:
1. Third-Party Android Recorders (in DeX)
The good news is that many of those third-party screen recorder apps we discussed earlier? They often still run in DeX. You can launch something like AZ Screen Recorder or XRecorder while you're in your DeX environment.
My experience: It can sometimes be a little fiddly. You might see the app's floating controls designed for a phone screen, or you might need to launch it and then quickly switch to the app you want to record. Using your mouse to hit start/stop is pretty much essential. You’ll also want to dive into the recorder’s settings to match the resolution to your DeX output (likely 1080p or even 1440p if your monitor and device support it). A bit of trial and error might be needed to get the orientation and sizing just right, but it’s definitely a viable on-device solution.
2. Use Your PC to Record DeX
If you’re using DeX on your PC – either via the Samsung DeX desktop app with a USB connection or wirelessly – this is often the cleanest method. Your computer already has screen recording tools.
On Windows, the built-in Xbox Game Bar (just hit Windows Key + G) can record the DeX app window. Super easy.
For more control, especially if I'm making content for my tech blog or YouTube channel, I’d fire up OBS Studio (Open Broadcaster Software). It’s free, powerful, and lets me capture the DeX window with custom settings.
On a Mac, QuickTime Player has a screen recording function, or again, OBS is a great cross-platform choice.
The beauty of this method is that your PC is doing the heavy lifting, so it doesn’t strain your phone’s resources. This means smoother recordings, especially for longer sessions or when you're doing something demanding in DeX.
3. External HDMI Capture Device
This one’s for the real hardware enthusiasts or if you need absolutely pristine, uncompressed capture. If you're running DeX directly to an external monitor using an HDMI adapter or a DeX dock (no PC in the middle), your phone is just outputting an HDMI signal. You can intercept that signal with an HDMI capture card.
You'd plug your phone's HDMI output into the capture card, then the capture card into your monitor, and the capture card also connects to a PC (usually via USB) where you run software to record the feed. It's how many game streamers capture console gameplay.
Is it overkill for most people? Probably. But if you have the gear or need that level of quality for professional work, it's an option.
What About Game Launcher in DeX?
If you're running a game in DeX, you might think, "Aha! Game Launcher!" Unfortunately, Game Booster's recording tools are also typically disabled or unavailable in DeX mode. So, it’s back to third-party apps on the device or external recording.
So, to sum up DeX recording: while Samsung hasn't given us a native DeX screen recorder (yet – fingers crossed they add it, as it’s a much-requested feature!), using a third-party Android app within DeX, or better yet, recording the DeX window from your connected PC, are your best bets. Just be mindful if you are recording directly on the phone while in DeX mode – it can add extra load to the CPU and GPU. If things feel laggy, the PC recording route is definitely smoother.
How to Fix Samsung Screen Recording Issues

You’ve got your method, you hit record, and… something’s off. Maybe there's no sound, the video looks like it was filmed on a potato, or it just plain won’t work. Don’t worry! Most screen recording issues on Samsung devices have pretty straightforward solutions. Let's walk through some of the most common ones I've encountered or helped others with.
1. My Samsung Screen Recording Has No Sound!
This is probably the number one complaint I hear. You’ve got this beautiful video, but it’s a silent film. Here’s the usual checklist:
Did You Pick the Right Sound Setting? (Native Samsung Recorder)
Remember that little pop-up when you start Samsung's recorder? No sound, Media sounds, or Media sounds and mic. It's surprisingly easy to tap "No sound" by mistake if you're in a hurry. I’ve done it. Double-check you’ve selected either "Media sounds" (for in-app audio) or "Media sounds and mic" (for app audio plus your voice) before you start. If it was on "No sound," well, that’s your culprit.
App Restrictions
This is a big one. Your Samsung (and Android in general) is designed to block audio recording in certain situations for privacy and legal reasons.
Calls: You cannot record the audio from voice calls or VoIP calls (like WhatsApp, Signal, etc.) using the standard screen recorder. It will always be silent. This is intentional.
DRM-Protected Content: Apps like Netflix, Amazon Prime Video, Spotify, and many other streaming services use Digital Rights Management (DRM) to prevent their content from being copied. Try to screen record, and you'll often get video with no sound, or sometimes even a black screen instead of video. From my law studies, I get the legal reasoning, but as a user, it can be frustrating if you just want to capture a tiny snippet to show a friend. There’s no official workaround for this, as far as I know. If you know one, please let me know down in the comments below or contact me directly.
Third-Party App Settings
If you're using an app like AZ Screen Recorder or XRecorder, dive into itsaudio settings. Some default to "microphone only." You'll need to find the option for "internal audio," "system sound," or "media sound" and enable it.
Remember: Generally, reliable internal audio capture on third-party apps became a thing with Android 10 and newer. If you’re on an older Android version (9 or below), these apps often can't grab internal audio directly, so your only option might be to record what the phone's speaker outputs via the microphone.
Volume & Mute Settings
Sounds basic, I know, but is your media volume actually up? If your phone is on silent or Do Not Disturb, and you selected "Media sounds," it might record silence simply because there was no media audio playing to record. Do a quick test with some music or a YouTube video playing.
Usually, one of these will solve the great audio mystery. For many, it's just toggling the right audio source in the recorder settings.
2. Why Does My Recording Look Pixelated or Laggy?
If your masterpiece looks more like a blurry, choppy mess, try these tweaks:
Increase the Resolution/Quality (Wisely)
Samsung's Recorder: Go into its settings (long-press the Quick Settings tile or via Settings > Advanced Features) and set Video Quality to 1080p (High). This is usually the best balance for clarity.
Third-Party Apps: Manually select a higher resolution (e.g., 1080p) and a decent bitrate. A low bitrate is often the cause of blocky, pixelated video. For 1080p, I aim for at least 10-15 Mbps, maybe more if there's a lot of fast motion. Just remember: higher quality = larger file sizes. It's a trade-off.
Check Frame Rate Settings
Most recordings default to 30 frames per second (fps), which is fine for most things. But if you're recording fast-paced gameplay or quick UI animations and want that buttery-smooth look, try switching to 60fps.
Samsung's native tool is usually 30fps. Some third-party apps (like AZ or XRecorder) let you choose 60fps.
Caveat: Recording at 60fps is more demanding on your phone. If your device is older or not a flagship, it might struggle, leading to more lag. Test it out.
Close Other Apps
Screen recording takes processing power and memory. If you've got a dozen other apps running in the background, your phone might slow down, causing stutters or dropped frames in your recording. Before you start an important recording, swipe away unnecessary apps. Game Booster often has a setting to optimize for gameplay, which can include minimizing background processes and notifications – very handy.
Beware of Heat & Throttling
Ever notice your phone getting toasty during a long recording session or intense gaming? That heat isn't just uncomfortable; it can cause your phone's performance to throttle (slow down) to protect itself. This directly impacts recording quality.
If you’re planning a long take, try to keep your device cool. Remove any thick case, avoid direct sunlight, and maybe even take breaks. If your phone feels like it could fry an egg, and your video is choppy, that’s your cue to let it cool down.
Engage High-Performance Mode (If Available)
Some Samsung phones offer a "Performance mode" (check Settings or Game Booster). Enabling this can give your phone a temporary power boost, which might help maintain smoother performance during recording, potentially leading to a better final video. Just know it'll use more battery.
3. Other Common Glitches and Their Fixes
Screen Recorder Icon Still Not Showing
If you’ve tried everything from the "Enabling the Tile" section earlier and that icon is just gone, and you're sure your device should support it (e.g., you have a Galaxy S21 on the latest One UI), it's unusual. You should consider more advanced steps like wiping the cache partition (do this with care) or, as a last resort, a factory reset. But before that, checking with Samsung Support might be wise. Most likely, though, if it's not there after basic checks, you'll need a third-party app.
Recording Just Stops on Its Own
Storage Full? Videos, especially high-quality ones, are big. If you run out of space, the recording will stop. Always check you have ample free storage before starting. I learned this the hard way trying to record a long piano practice session once – frustrating!
Interrupted? Answering a phone call will usually stop the recording.
App Limits? Some free versions of third-party apps might have time limits (though the main ones I recommended generally don't for basic recording).
Battery Saver Aggression? Aggressive battery-saving modes can sometimes kill background apps, including your recorder. Try disabling battery saver or whitelisting the recorder app.
Can’t Record Certain Apps (Black Screen)
We touched on this with audio, but it applies to video too. Apps dealing with sensitive information (banking apps, password managers) or copyrighted content (Netflix, Hulu, etc.) will often block screen recording entirely. You’ll just get a black screen or an error message. This isn't a bug in your recorder but a security or DRM feature. No easy fix here other than the old-school method of literally pointing another camera at the screen (which looks terrible, in my opinion) or finding an alternative way to show what you need.
Audio Out of Sync
This can be a real pain. If your audio consistently lags behind or rushes ahead of the video, it often means the device was under too much strain during recording.
Prevention: Try the performance tips above (close apps, lower quality slightly, keep it cool).
Fix (Advanced): If it's a minor sync issue, you can sometimes fix it in video editing software by detaching the audio track and nudging it a few frames. But that’s getting into more advanced territory.
Error: "Recording failed to save"
This annoying message usually points to a storage issue (no space left) or a temporary glitch with the recording service.
Check your storage. Free some up if needed.
Make sure the "Samsung Capture" system app (or the third-party recorder app) has all necessary permissions (Storage, especially). You can check this in Settings > Apps.
A simple reboot of your phone often clears up temporary glitches like this.
Phew! That covers most of the common screen recording hiccups. Generally, Samsung's screen recording, especially with the native tool on recent One UI versions, is pretty robust. With the tips in this guide, you should now be well-equipped to capture your screen on almost any Samsung Galaxy device, whether it's a brand-new foldable or a trusty older model.
Wrap Up
So, that’s pretty much everything I’ve learned about mastering screen recording on Samsung devices, from the built-in tools to third-party apps and even those DeX workarounds. I’ve tried to cover all the bases, drawing from my own experiences wrestling with these features for my content here on the blog and my YouTube channels.
Now, I’d love to hear from you! What are your go-to methods for screen recording on your Samsung? Did you run into any quirky issues that I didn’t cover, or do you have a killer tip that’s saved you time? Drop your thoughts, experiences, and any lingering questions in the comments section below. I always enjoy reading through them and seeing what solutions others have found.
And if you found this deep dive helpful and you’re into clear, no-nonsense tech guides, reviews, and insights like this, consider subscribing to my tech newsletter. I share my latest findings, tips on getting the most out of your gear, and my honest thoughts on the tech that shapes our world, delivered straight to your inbox. No fluff, just practical stuff.
Thanks a lot for reading, and I’ll see you around!
FAQ
-
Ah, the disappearing button act! A few things could be happening here:
It might need to be added: Swipe down fully to open your Quick Settings, tap the three-dot menu (or pencil icon), and choose "Edit buttons." Look for "Screen recorder" in the available buttons list and drag it into your active panel.
Your device might be older: If you have an older Galaxy device (typically pre-One UI 2.0, which came with Android 10), it might not have a native screen recorder. In that case, you’ll want to check out the sections in the main post about using the Game Launcher trick or installing a third-party screen recorder app. I relied on those for years before built-in options became standard.
Software glitch (rare): If you have a newer phone that should have it and it's still missing after trying to edit the panel, make sure your device software is up to date. If it is, and the option (including settings in Advanced Features) is completely gone, that's unusual, and you might need to look into a software reset or contacting Samsung.
-
This is super important, especially for us content creators!
Using Samsung's Built-In Recorder: When you tap the "Screen recorder" toggle, that little menu pops up. Make sure you select "Media sounds" (to capture only the internal audio) or "Media sounds and mic" (to capture internal audio plus your voice through the microphone). If you pick "No sound," well, you get silence!
Using Third-Party Apps: Dive into the app’s settings menu. You're looking for an audio source option. It might be called "Internal audio," "System sound," "Device audio," or something similar. Select that. Most good third-party apps can do this on Android 10 and newer. If you're on an older Android version (Android 9 Pie or earlier), capturing internal audio directly with third-party apps was often not possible without root access, so you might only get microphone audio.
Game Launcher: Samsung's Game Launcher recorder was actually one of the early ways to reliably capture internal game audio on Samsung devices, even before it was a widespread Android feature.
-
The annoying silent recording! It’s usually one of these culprits (covered in more detail in the troubleshooting section above):
Wrong sound setting chosen: You might have accidentally selected "No sound" on the native recorder's pop-up.
DRM or app restrictions: Apps like Netflix, Spotify, or banking apps often block audio (and sometimes video) recording. Calls also won't have their audio recorded.
Third-party app misconfiguration: The app might be set to "Microphone" only, or "Mute." Check its audio settings.
Phone's media volume muted: If your phone's media volume is all the way down or muted, "Media sounds" might record silence. I always do a quick test!
-
Generally, no. Most apps that handle copyrighted content (streaming services) or sensitive information (banking apps, password managers) have security measures (like DRM or specific flags in the app's code) that prevent screen recording. You'll often just get a black screen, an error message, or a recording without the crucial content. This isn't a bug with your phone or the recorder; it's an intentional protection. There's no official way around this. For my own workflow, if I need to reference something from a protected app for legitimate review purposes (and it's allowed by terms of service), I sometimes have to resort to describing it or using publicly available promotional screenshots if direct capture isn't possible.
-
s someone who uploads a lot of screen recordings, quality is key for me!
Resolution: Aim for 1080p (Full HD) if your device and recorder support it. This usually offers the best balance between clarity and file size for online content. Some high-end devices might even offer 1440p.
Bitrate (for third-party apps): If your app allows you to set the bitrate, don't skimp on it. For 1080p at 30fps, I'd start around 10-15 Mbps. For 60fps, you might want to go higher, maybe 15-25 Mbps or more, if your device handles it smoothly. Higher bitrates mean better image quality (fewer compression artifacts) but larger files.
Frame Rate (FPS): 30fps is standard and fine for most tutorials. However, for smoother motion, especially when recording gameplay or fast UI animations, 60fps looks significantly better. Samsung's native recorder is often fixed (usually 30fps), but many third-party apps like AZ Screen Recorder or XRecorder let you choose 60fps.
My approach: I usually record at 1080p, 60fps if the content benefits from it (like a fast-paced game or UI demo) and the device can keep up without overheating. For static tutorials, 1080p at 30fps is often perfectly fine and saves some storage. Always do a test!
-
Yes, screen recording can be quite demanding!
Close background apps: Free up RAM and processing power by closing all unnecessary apps before you start recording.
Lower recording settings: If 1080p at 60fps is too much, try 1080p at 30fps, or even 720p.
Enable "Do Not Disturb" mode: This prevents notifications from popping up and potentially causing stutters. Game Booster often has a feature for this.
Take off thick cases: Some cases can trap heat.
Avoid charging while recording heavily: This can add to heat buildup.
Give your phone a break: If it’s getting noticeably hot, pause the recording and let it cool down. Pushing it too hard can lead to performance throttling.
-
You're right, the native one takes a vacation in DeX! My main workarounds are:
Use a third-party Android screen recorder app (like AZ Screen Recorder) launched within the DeX environment.
If you're using DeX on a PC (connected via USB or wirelessly), use your PC's screen recording software (like Xbox Game Bar on Windows, OBS Studio, or QuickTime on Mac) to capture the DeX window. This is often the smoothest option as it offloads the work to your computer. It's a bit of a hassle, but these methods get the job done until Samsung (hopefully!) adds native DeX recording.
-
Good question! For most everyday tasks, Samsung's built-in recorder is convenient and does a great job. I use it for quick captures all the time. However, you might consider a third-party app if you need:
More control over settings: Things like specific resolutions, bitrates, higher frame rates (like consistent 60fps or even 120fps on some apps/devices), or choosing different video encoders.
Advanced features: Pause/resume during recording (some native versions lack this or it's clunky), more robust on-screen drawing tools, internal video editing features beyond basic trimming, or options to record directly to GIF.
Recording on older devices: If your Samsung doesn't have the native tool, a third-party app is essential.
Specific workflow needs: Some apps offer unique features like scheduling recordings or streaming directly from the app.
So, it really depends on your needs. For basic stuff, native is fine. For more power-user features or specific content creation needs, a good third-party app can be a valuable tool in your kit.
MOST POPULAR


LATEST ARTICLES